Showing posts with label diorama. Show all posts

Thursday, 19 October 2017

Women in literature


Three matchboxes with women in literature, Virginia Woolf, George Eliot and Emily Dickinson. I really enjoyed making these! I love George Eliot's books, they are the perfect mix of love, drama and real life on the country on the Victorian era but given with great wit and insight. Woolf's books are more layered, her stream of consciousness is not easy to follow but very rewarding when you get into it. I have to admit that I haven't read a lot of Dickinson's poetry, just a few poems most notably her "Hope is the thing with feathers" which inspired me to make the cover of her matchbox :-)

xoxo
Aleka

Saturday, 29 July 2017

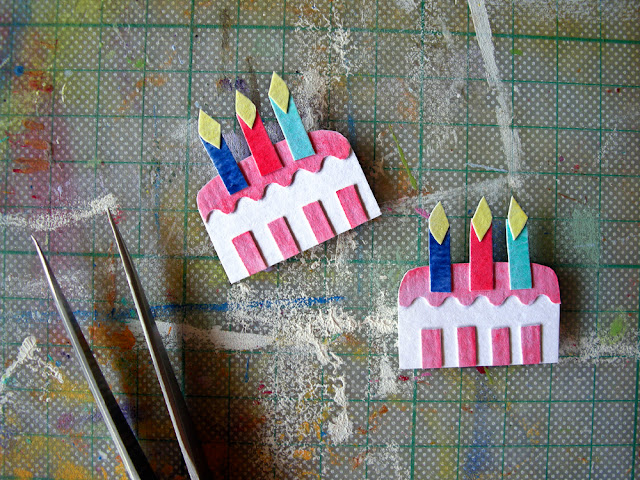
Happy birthday matchbox

miniature paper cake

happy birthday matchbox card

A couple of Happy Birthday matchboxes that I made this week! I love how each one is slightly different from the other, that's what handmade is all about!

If you want to wish someone special happy birthday you can find the matchbox here :-)

xoxo,
Aleka

Tuesday, 25 July 2017

Ice cream matchbox


A fun little matchbox to get over the summer heatwave: a paper popsicle! It is guaranteed to bring giggles, fun and zero calories :-)

xoxo,
Aleka


Tuesday, 20 June 2017

Matchbox ladies

matchbox dioramas

women in history diorama

famous women matchbox art

Hi!
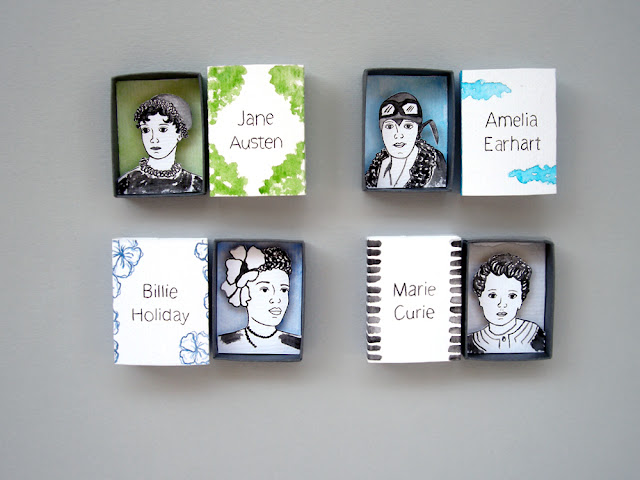
I've had this idea in my head for a while, a sort of collection of matchboxes with a specific theme. I thought of various ideas and there were a couple that seemed more interesting and challenging to me. So here is the one that I picked: I'm making matchboxes with portraits of important women in history. Women that have left their mark in various fields through the years, from science to arts these women have one thing in common: their work is celebrated by all today :-)
Here are four matchboxes I've already made, Jane Austen, Amelia Earhart, Billie Holiday and Marie Curie. I'm hoping to make more and grow this collection!
Wishing you a lovely day,
Aleka

Tuesday, 20 September 2016

Traveling matchboxes


I had this idea in my mind for a while, making matchboxes with famous monuments from various countries. Like most projects I kept pushing it back on my to do list, so it wasn't until last month that I finally started trying out my idea. First it was the Eiffel tower, after a couple of versions and I selected the one I liked most. Then I took a shot at the Acropolis, thought it seemed harder it turned out that my first try was perfect! For Italy I picked the Leaning Tower of Pisa, it's a simple design but with a lot of detail.
They will be soon in the shop and hopefully more monuments will follow!
Aleka

{Linked to homework

Thursday, 18 February 2016

Working with paper

https://www.etsy.com/listing/234079142/anatomical-heart-art-matchbox-art-paper

https://www.etsy.com/listing/234079142/anatomical-heart-art-matchbox-art-paper?ref=shop_home_feat_1

Now I understand the impact of Valentine's day to commerce. I think I made around 70 paper hearts and matchboxes in the months of January and early February. I do enjoy making matchboxes so I'm working on a couple of new ideas :-)

Hope you have a lovely day,
Aleka

Wednesday, 16 September 2015

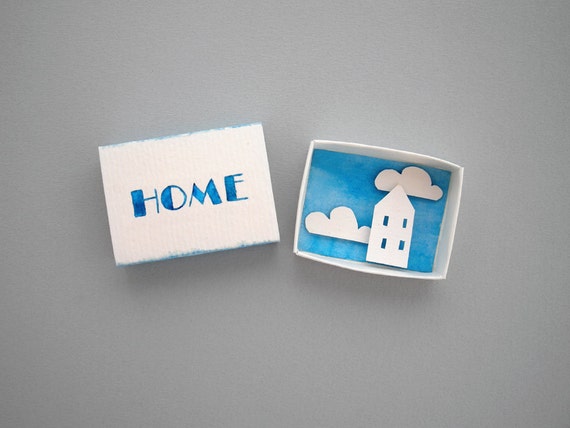
Home


Our contribution to the Etsy Greek Street Team for good action: a home matchbox!

This item participates in the Egst for Good Action and all profit will be given for the humanitarian crisis relief. All profit will be given to the needs of Medicins Du Monde in Greece http://mdmgreece.gr/en/ for the help they provide to Syrian refugees who come to our shores these days trying to be saved from the war in Syria. A copy of the donation's receipt will be provided to the buyer of the matchbox and to our fabulous Etsy Greet Street Team who organizes the action: http://etsygreekstreetteam.blogspot.gr/2015/09/egst-for-good.html

Have a lovely day, 
Aleka

Saturday, 12 September 2015

Paper and clay


Working on googly eyed owls from clay, I want to figure out some details before I can turn them into a listing. Also working on a new matchbox, soon to be in the shop, I have to admit it's turning out to be one of my favorites :-)
Enjoy your weekend,
Aleka

Thursday, 10 September 2015

Work in progress


A small break turned out into a bigger one but that's life I guess :-)
The steps of making my All You Need matchboxes in green, now they are traveling to meet their new owner!

Hope you are having a lovely week,
Aleka

Saturday, 30 May 2015

Tuesday, 12 May 2015

In progress


The uninspired phase has passed, I am actually working on a few projects at the same time! Too bad the weather is so moody I can't take good photos. Anyway here is a sneak peek of the new designs for my tiny matchbox dioramas :-)

Hope you're having a lovely day,
Aleka

Saturday, 7 August 2010

Making of a diorama


To make this all you need is a small box (I used a box from a soap bar), some tissue paper, small scraps of thick paper and PVA glue.
1. Take the box and open it carefully at the seam where it is glued together.
2. Next cut away the parts that are colored dark orange. As you can see on one big side is the rectangle that you will cut out and on the other side you will paint and glue your stuff.
3. Paint the inside. I wanted to make it seem like outer space so I used a dark purple color. I didn't paint the small flap because that will fold when I close my box. I also didn't paint the side of the window since that side won't be visible at all.
4. Use smaller scraps of thick paper to cut the shapes you want to put in your box. When you glue something to the background you can use glue dots to make it pop out (I don't have any glue dots so I use small pieces of balsa wood). When you want to put something to the base of your box, score it to make a small fold and glue that on the base. Don't forget to paint the part of the fold that is glued to the base of your box so that it blends in.
5. Glue the top flap first and then the sides. After I apply glue to the flap I flip it over so that it is against my desk and then use the back of a paintbrush to apply force from the inside so that it will glue securely. Next glue the sides. I use PVA glue and have to hold them for a bit until the glue dries.
6. Cover the outside of your box with one or two layers of tissue paper, that will also help cover the parts on the sides that haven't fully closed. Paint with gesso and then you can paint it as you like.
When I finished it I realized that the background is too dark and that's why the planet and the star don't really seem to pop out especially in the photo, they do look better in real life. I think it would have looked better if I had used more colors maybe painted it to look like a milky way or something.
Have fun!

Wednesday, 4 August 2010

Diorama


I always wanted to make a diorama so about a month ago I made my first one. It's the one with the ship and you can tell it is my first one because it's a bit sloppy. I really didn't know exactly what I was doing, I guess that's why it is so messy looking but I still kind of like it though. Anyway, after my first attempt I tried again, thinking first about how I should make it and I think the result is much better. I want to make another one soon, I think I will photograph the process as well and turn it into a tutorial.